
One useful accessibility feature that lets people text without a physical keyboard is macOS’s on-screen keyboard. The on-screen keyboard can be a helpful tool whether you’re using a touchscreen Mac, have a broken keyboard, or just need a different way to enter data.
This tutorial will show you how to activate, personalize, and troubleshoot your Mac’s on-screen keyboard. In order to enhance your typing experience, we’ll also look at several input possibilities.


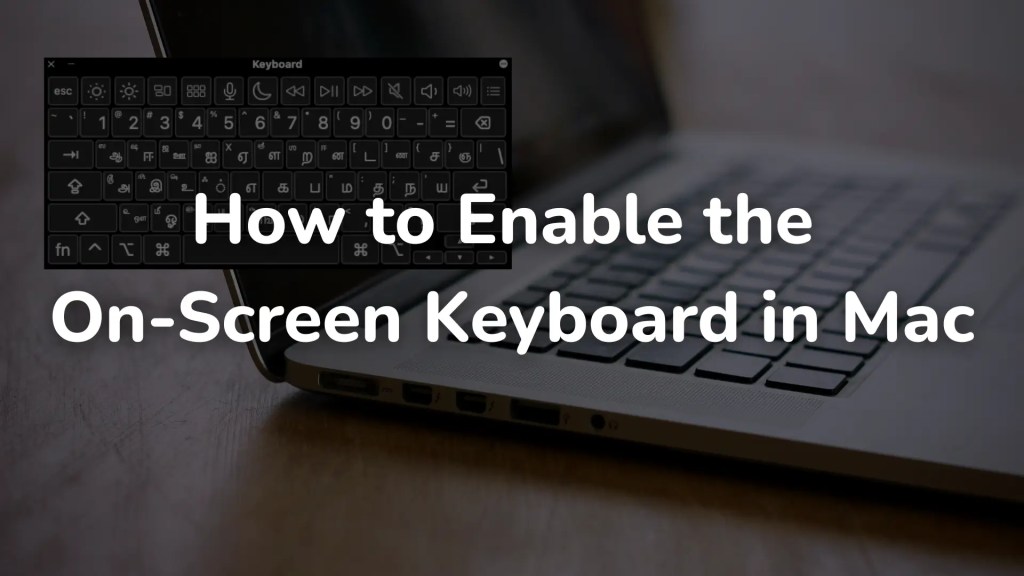
Understanding the on-screen keyboard on Mac
One of macOS’s most important accessibility features is the on-screen keyboard, which enables typing without a hardware keyboard. It is a screen-based virtual keyboard that may be operated with a mouse, trackpad, or other input devices. In situations where a physical keyboard might not be accessible or available, this gadget is especially helpful.

– What is the on-screen keyboard?
A software-based tool that simulates the operation of a physical keyboard is macOS’s on-screen keyboard. With the help of your mouse, trackpad, or other assistive technology, you can click on the virtual keys that are displayed on the screen.
- Because it is customizable, users can change the layout, size, and functionality of this keyboard to fit their needs.
- In addition to conventional typing operations, it allows users to do specific functions including managing the system, inserting symbols, and using shortcuts.
- When a real keyboard isn’t a possibility, users can interact with their Mac with more freedom and flexibility thanks to the on-screen keyboard.
– When and why you might need to use it
There are several reasons why someone might need to use the on-screen keyboard on a Mac:
- Broken or unresponsive physical keyboard: If your Mac’s physical keyboard stops functioning, the on-screen keyboard provides an easy solution to continue typing without needing to repair or replace the hardware immediately.
- Accessibility for disabled users: The on-screen keyboard is a great tool for individuals with mobility impairments or other disabilities who find it difficult to use a traditional keyboard. It can be paired with other assistive technologies such as voice commands or eye-tracking software to make it more accessible.
- Temporary alternative: If you’re in a situation where a physical keyboard isn’t available (such as on a touchscreen Mac or while using a device like an iPad with macOS through Sidecar), the on-screen keyboard can serve as a convenient alternative.
- Privacy and security: Using an on-screen keyboard can help improve security when entering sensitive data, such as passwords or credit card information. Since physical keyboards can be compromised by keylogging software, the on-screen keyboard ensures that keystrokes are not recorded.

Enabling the On-Screen keyboard on Mac
There are a number of simple ways to enable the Mac’s on-screen keyboard. You can use this functionality in a variety of ways depending on your macOS version, which offers flexibility for a range of user requirements. The ways to activate the on-screen keyboard are listed below.
– Using System Settings (macOS Ventura & Later)
To enable the on-screen keyboard on macOS Ventura or later, follow these simple steps:
- Open System Settings by clicking the Apple logo in the top-left corner and selecting System Settings.
- Scroll down and click Accessibility in the left sidebar.
- In the Motor section, click on Keyboard.
- Turn on the on-screen keyboard by toggling the switch.
Once enabled, the on-screen keyboard will appear as an accessible overlay that you can click on using your mouse or trackpad. You can also resize and adjust its position to make it more comfortable.
– Using accessibility options (Older macOS Versions)
For older versions of macOS (prior to Ventura), enabling the on-screen keyboard can be done through the Accessibility settings:
- Click on the Apple menu and select System Preferences.
- Select Accessibility from the list of options.
- In the Accessibility panel, choose Keyboard from the left sidebar.
- Check the box labeled Enable On-Screen Keyboard.
Once activated, the on-screen keyboard will appear on your screen and function just like a physical keyboard. You can click on the keys using the mouse or a trackpad.
– Enabling the keyboard from the Menu Bar
In some cases, you can quickly enable the on-screen keyboard from the menu bar. Here’s how:
- Click the Apple logo in the top-left corner of the screen and open System Preferences.
- Select Keyboard from the preferences menu.
- Check the box for Show Keyboard and Emoji Viewers in Menu Bar.
- From the menu bar at the top of your screen, click on the Keyboard icon and select Show Keyboard Viewer.
The on-screen keyboard will pop up, allowing you to use it for typing. You can easily hide it again by clicking the same icon and selecting Hide Keyboard Viewer.

Using and customizing the on-screen keyboard
It’s helpful to adjust the on-screen keyboard to your needs after turning it on. There are several ways to personalize your macOS experience, including altering its appearance, turning on predictive text, and resizing its screen. How to use and customize the on-screen keyboard on your Mac is explained below.
– Adjusting the keyboard size and layout
You can easily adjust the size of the on-screen keyboard to make it more comfortable for you to use. Here’s how:
- Open the keyboard viewer: If you haven’t already enabled the on-screen keyboard, follow the steps mentioned earlier to open the Keyboard Viewer from the menu bar or System Preferences.
- Resize the keyboard: Once the on-screen keyboard is visible, you can resize it by clicking and dragging the corners of the keyboard window. This will allow you to make the keyboard larger or smaller depending on your preferences.
- Switch keyboard layout: If you use a non-standard keyboard layout (such as a different language or a custom layout), you can change it by going to System Preferences → Keyboard → Input Sources. From there, you can select or add a new keyboard layout, and it will automatically adjust the on-screen keyboard to match.
– Enabling predictive text and additional features
The on-screen keyboard in macOS can be made smarter by enabling features like predictive text, which helps you type faster by suggesting words based on your input. Here’s how to enable these features:
- Enable predictive text: Go to System Preferences → Keyboard → Text. Here, you can enable features like Correct Spelling Automatically or Use Smart Quotes. While these settings won’t directly affect the on-screen keyboard, they will work in conjunction with it to make typing more efficient.
- Enable auto-capitalization: This feature helps you by automatically capitalizing the first letter of sentences. It can be found in the same Keyboard settings under Text.
- Enable emoji and symbol suggestions: The on-screen keyboard can also be used to insert emojis and special characters. Simply click the Emoji button (usually a smiley face icon) on the keyboard to bring up a selection of symbols and emojis for easy insertion.
– Changing the appearance and theme
The appearance and theme of the on-screen keyboard can be adjusted to suit your aesthetic or accessibility needs. macOS offers a simple way to customize how the on-screen keyboard looks:
- Dark Mode: macOS supports Dark Mode, which changes the appearance of the entire system, including the on-screen keyboard. To enable Dark Mode, go to System Preferences → General and select the Dark option under the Appearance section.
- Change keyboard color: By default, the on-screen keyboard uses the system’s theme (light or dark), but you can change how certain keys look with third-party apps or customization tools.
- Use high contrast: For users with visual impairments, macOS offers a High Contrast option for better visibility. This can be enabled under System Preferences → Accessibility → Display, and you can select the Increase Contrast option. This will make the on-screen keyboard stand out more clearly against the background.

Troubleshooting on-screen keyboard issues
Even while macOS’s on-screen keyboard is usually dependable, problems can occasionally arise. You can immediately resume using your Mac effectively if you know how to troubleshoot issues like the keyboard not opening or becoming uncooperative. Here are a few typical problems and solutions:
– What to do if the on-screen keyboard won’t open
If you are having trouble opening the on-screen keyboard on your Mac, there are a few things you can try to resolve the issue:
- Check Accessibility Settings: Sometimes, the keyboard may not appear if the accessibility settings are misconfigured. Go to System Preferences → Accessibility and check the settings under Keyboard. Make sure the Enable On-Screen Keyboard option is checked.
- Restart the Mac: A simple restart can resolve many system glitches. If the keyboard isn’t opening, try restarting your Mac to refresh the system and reload any necessary processes.
- Use the Menu Bar: The on-screen keyboard can also be opened from the menu bar. If it’s not showing up through the usual methods, click on the Input menu in the menu bar (it might look like a flag or language icon), and select Show Keyboard Viewer.
- Update macOS: Sometimes, bugs in macOS can prevent the on-screen keyboard from working properly. Check for any available updates by going to System Preferences → Software Update and install any pending updates. These updates often include bug fixes that could resolve your issue.
- Check for conflicting apps or software: If you’ve recently installed third-party apps, they might interfere with the functionality of the on-screen keyboard. Try disabling or uninstalling these apps to see if the issue is resolved.
– Fixing unresponsive or missing keyboard issues
If the on-screen keyboard opens but is unresponsive or missing keys, follow these troubleshooting steps:
- Re-enable the keyboard: Sometimes, the on-screen keyboard might fail to function correctly due to a temporary glitch. Go to System Preferences → Accessibility → Keyboard and uncheck the option for the on-screen keyboard, then recheck it to restart the function.
- Clear cache and reboot: Cached data might cause the on-screen keyboard to misbehave. Clear your system cache by going to Finder → Go → Go to Folder and entering ~/Library/Caches. Delete any unnecessary files, then reboot your Mac.
- Test with Safe Mode: Boot your Mac into Safe Mode by restarting it and holding the Shift key. This will disable unnecessary startup items and allow you to see if any background processes are causing the issue. Once in Safe Mode, try opening the on-screen keyboard to see if it works. If it does, the issue is likely with third-party software.
- Reset NVRAM: Non-volatile random-access memory (NVRAM) stores settings related to your Mac’s hardware. If your keyboard is unresponsive, resetting the NVRAM might help. To reset it, restart your Mac and hold down Option + Command + P + R immediately after hearing the startup chime. Keep holding these keys for about 20 seconds before releasing them.

Alternatives to the on-screen keyboard
There are a number of other ways to enter text on your Mac that can provide greater flexibility or functionality if the on-screen keyboard isn’t sufficient for your needs. These are a few of the most well-liked substitutes:
– Using third-party virtual keyboards
More capabilities and customization are available with third-party virtual keyboards than with the macOS on-screen keyboard by default. Additional features like motion support, enhanced prediction, or distinctive keyboard layouts are included in a lot of third-party apps. Among the top third-party virtual keyboard applications are the following:
Karabiner-Elements: This robust utility lets you alter keyboard behavior on macOS and remap keys. Although its main function is to remap hardware keys, it also enables the usage of on-screen keyboards with extra functionality.
Typeeto: Typeeto enables you to operate other Bluetooth-enabled devices using the keyboard on your Mac’s screen. For customers who need to type on their Mac while using other devices, like as tablets or smartphones, it’s ideal.
Gboard: Also accessible on macOS, Gboard by Google is well-known for its emoji and predictive text recommendations. It’s a straightforward and efficient third-party keyboard with clever features that let you text more quickly.
TouchKeys: This app is useful for users who want a more touch-oriented experience. It creates a virtual keyboard on your Mac’s touchscreen (for MacBooks with touchbars or external touchscreen setups) and offers enhanced functionality for specialized input methods.
– Using voice control and dictation as an alternative
If you need help with accessibility or prefer hands-free input, voice control and dictation are great substitutes for the on-screen keyboard. The built-in voice input capabilities of MacOS can greatly increase your productivity. How to use them is as follows:
- Voice Control: You can operate your Mac completely using voice commands thanks to macOS’s robust Voice Control feature. This can be used to scroll, click buttons, open apps, and navigate the system in addition to dictating text.
To activate Voice Control, select Voice Control under System Preferences → Accessibility. Once activated, it allows you to enter special characters, such as punctuation, manage the user interface of your Mac, and dictate text without ever touching the keyboard.
Dictation: You can dictate text into any text field, such as a document, email, or browser, using macOS’s built-in Dictation feature. To activate dictation, navigate to System Preferences → Keyboard → Dictation. The dictation capability can then be activated by pressing the Fn (Function) key twice, or you can simply begin speaking when in a text input field. Dictation is a great choice for people who need to swiftly input big amounts of text because it functions flawlessly in the majority of programs.
– Exploring other options
macOS offers a variety of other accessibility input methods for users who may have difficulty using a traditional keyboard or mouse. These alternatives are designed to help users with motor impairments, visual disabilities, or other conditions. Some notable accessibility input options include:
- Switch Control: This option enables you to control your Mac using a variety of switches, such as buttons or touch sensors. Switch Control works well for users with limited mobility and provides a highly customizable input experience. To enable Switch Control, go to System Preferences > Accessibility > Switch Control. From here, you can set up a switch or other input method that allows you to navigate your Mac and type using simple gestures or physical switches.
- Trackpad or Mouse with Dwell Click: macOS allows you to configure the trackpad or mouse to automatically click when you hover over an element for a specified time (this is called “Dwell Click”). This feature can help users with limited hand mobility by eliminating the need to physically click the mouse button.
- Keyboard Shortcuts & Customization: If you find using a traditional keyboard challenging, you can use macOS’s built-in ability to create custom keyboard shortcuts. These shortcuts let you streamline your workflow by enabling you to perform specific actions without using the mouse. This is especially useful for individuals with motor impairments who need to minimize mouse use.
- AssistiveTouch: If you’re using an iOS or iPadOS device alongside your Mac, AssistiveTouch offers an on-screen interface that allows you to interact with your device without using the physical buttons. You can use gestures, voice commands, or custom shortcuts to control the device and perform tasks like typing, navigating apps, and more.
- Mouse Keys: Mouse Keys allow you to control the pointer using the keyboard’s arrow keys. This is an excellent option for people who find it difficult to use a traditional mouse or trackpad. To enable Mouse Keys, go to System Preferences → Accessibility → Pointer Control.